This module help you to conduct inventory count at your inventory location.
Stock transfer out from the original location will be hold at transit until it is accepted by the receiving location.
This will give an accurate status of the stock.
Create inventory count

- Inventory count will always create / initial from the Shopcada dashboard.
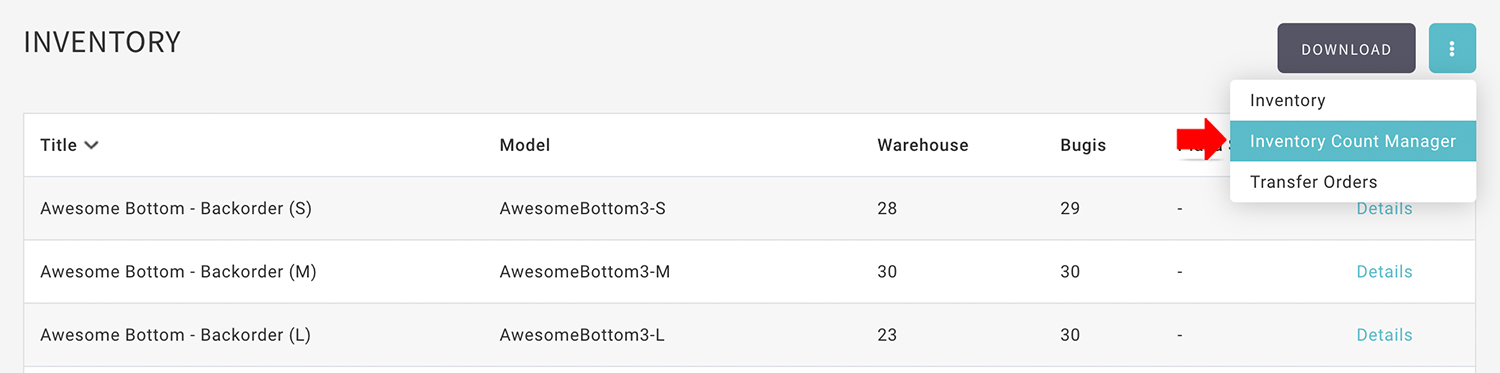
- From MANAGE YOUR STORE (DASHBOARD), go to PRODUCTS > INVENTORY
- Click on vertical ellipsis to go to [INVENTORY COUNT MANAGER].
- Click [NEW INVENTORY COUNT] to start a new transfer.
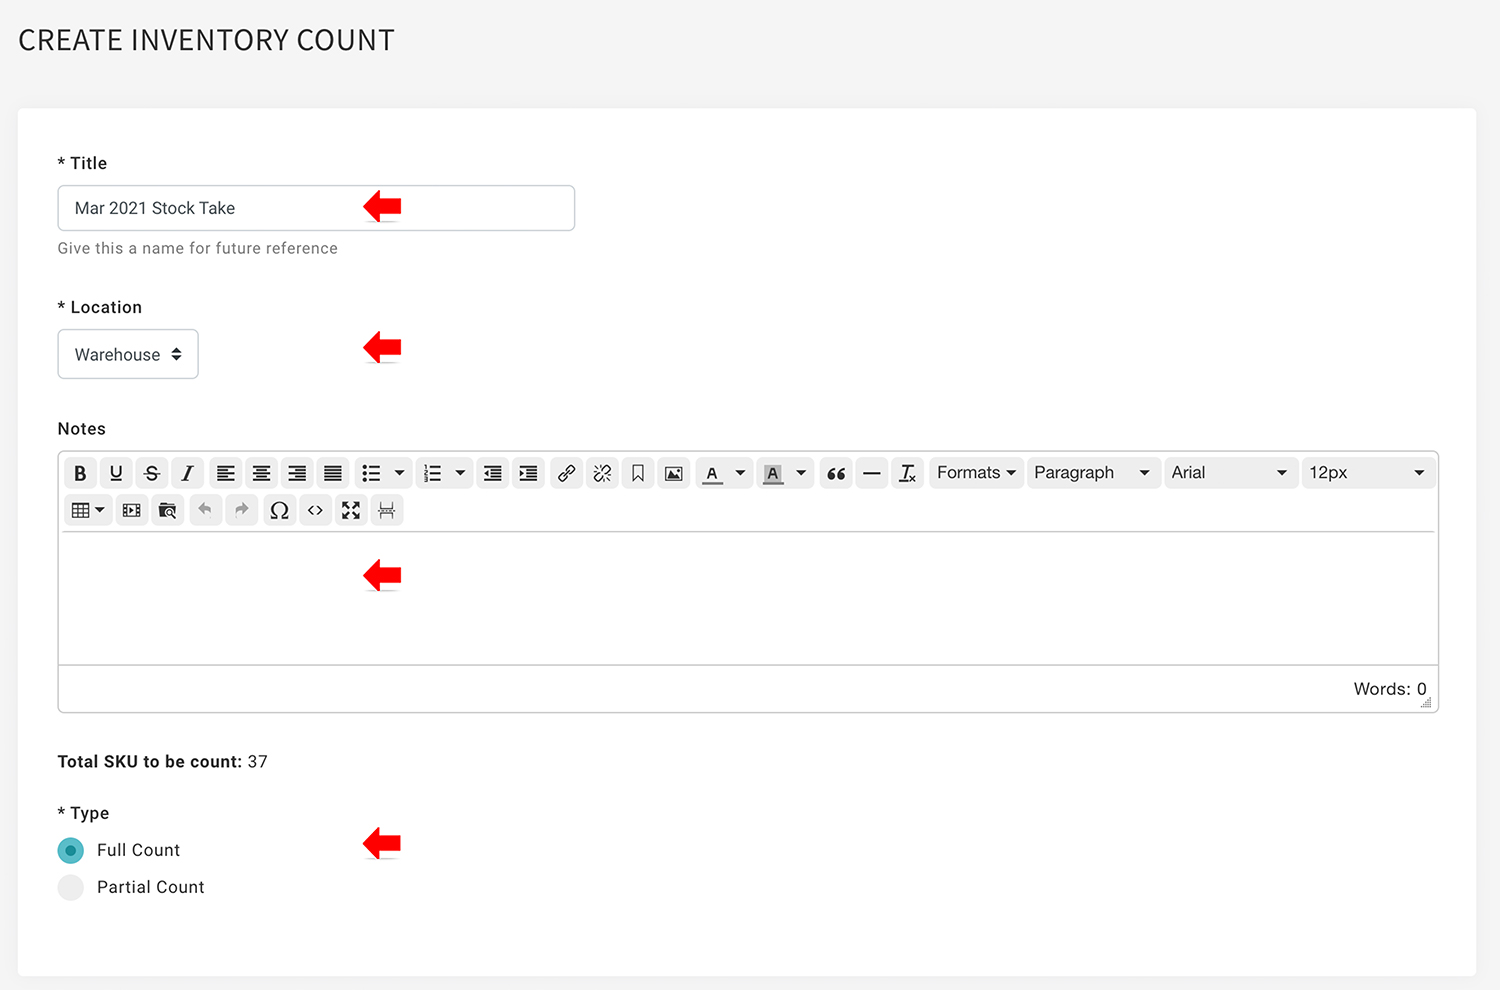
- Enter TITLE and LOCATION.
- You may enter optional noted for future reference.
- Select FULL COUNT or PARTIAL COUNT.
- Select Full count if you want to count all SKU for the selected location.
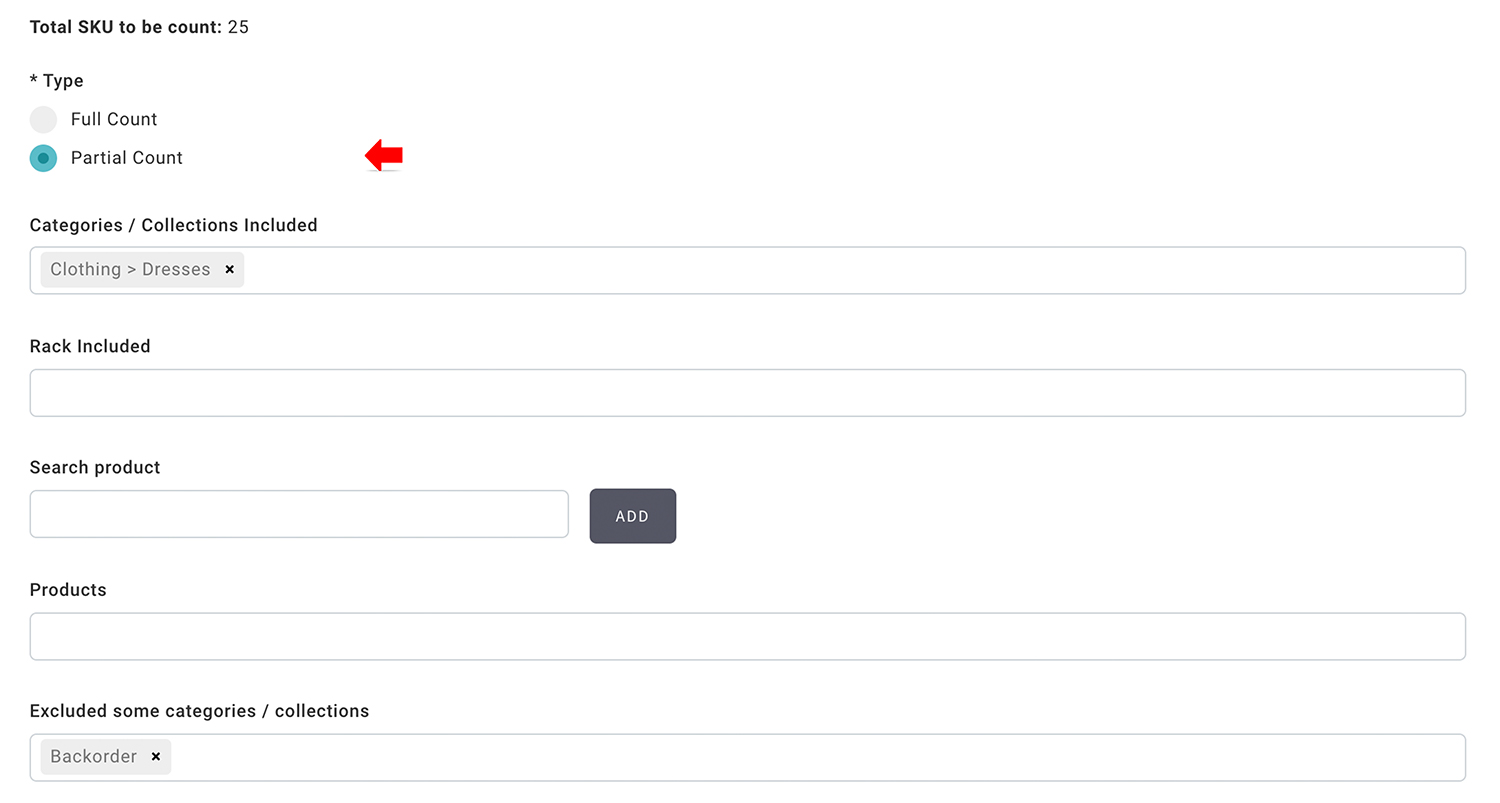
- Select Partial count if you want to count select products. You can filter the products by the combination of the provided parameters.
- Click [SAVE] to create a new inventory count.
Start inventory count for web store
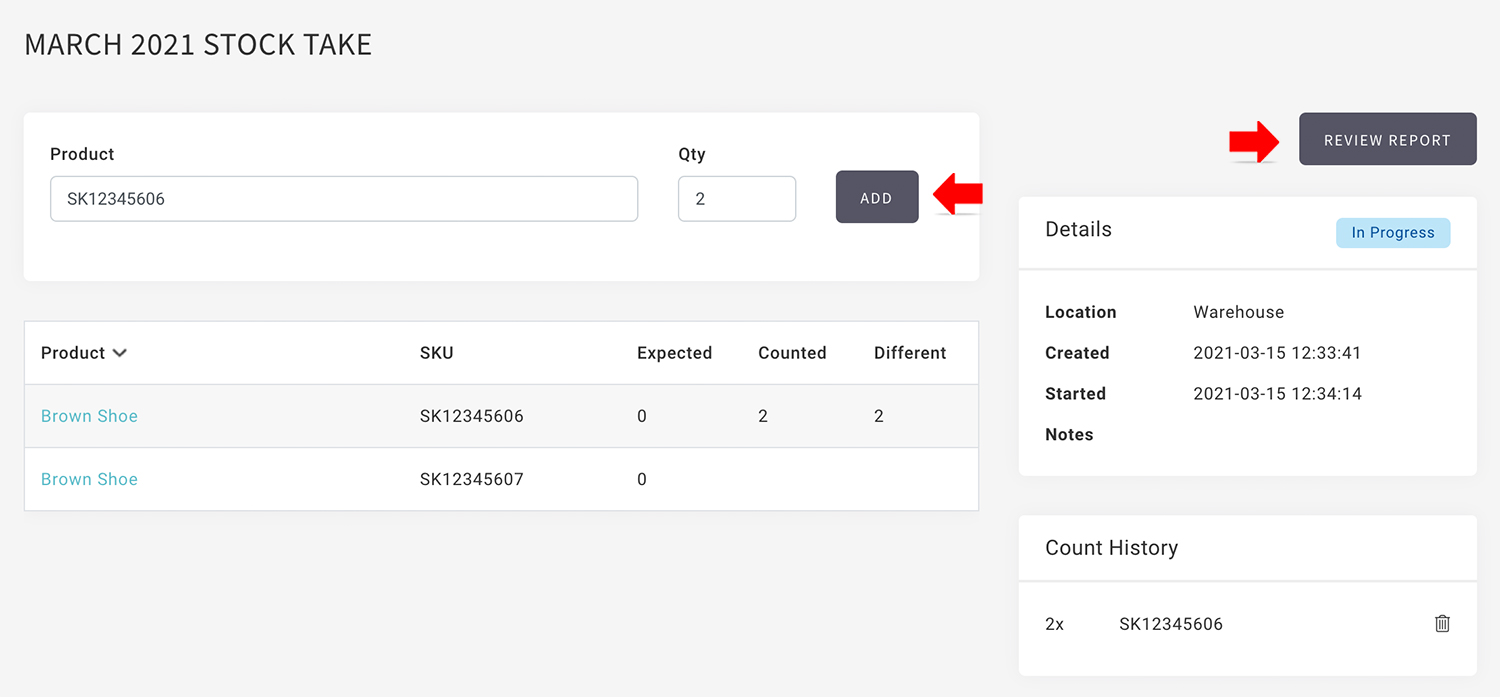
- Click [START] to start the inventory count.
- Enter the product NAME / SKU and counted QTY to add to the counted record.
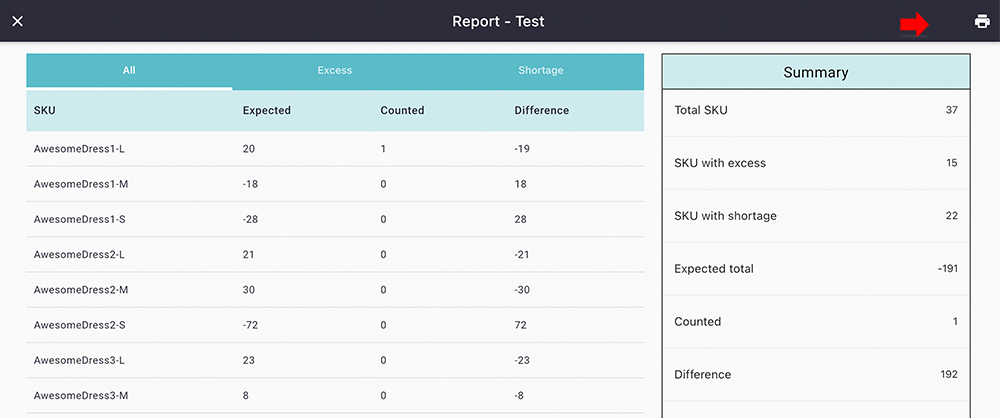
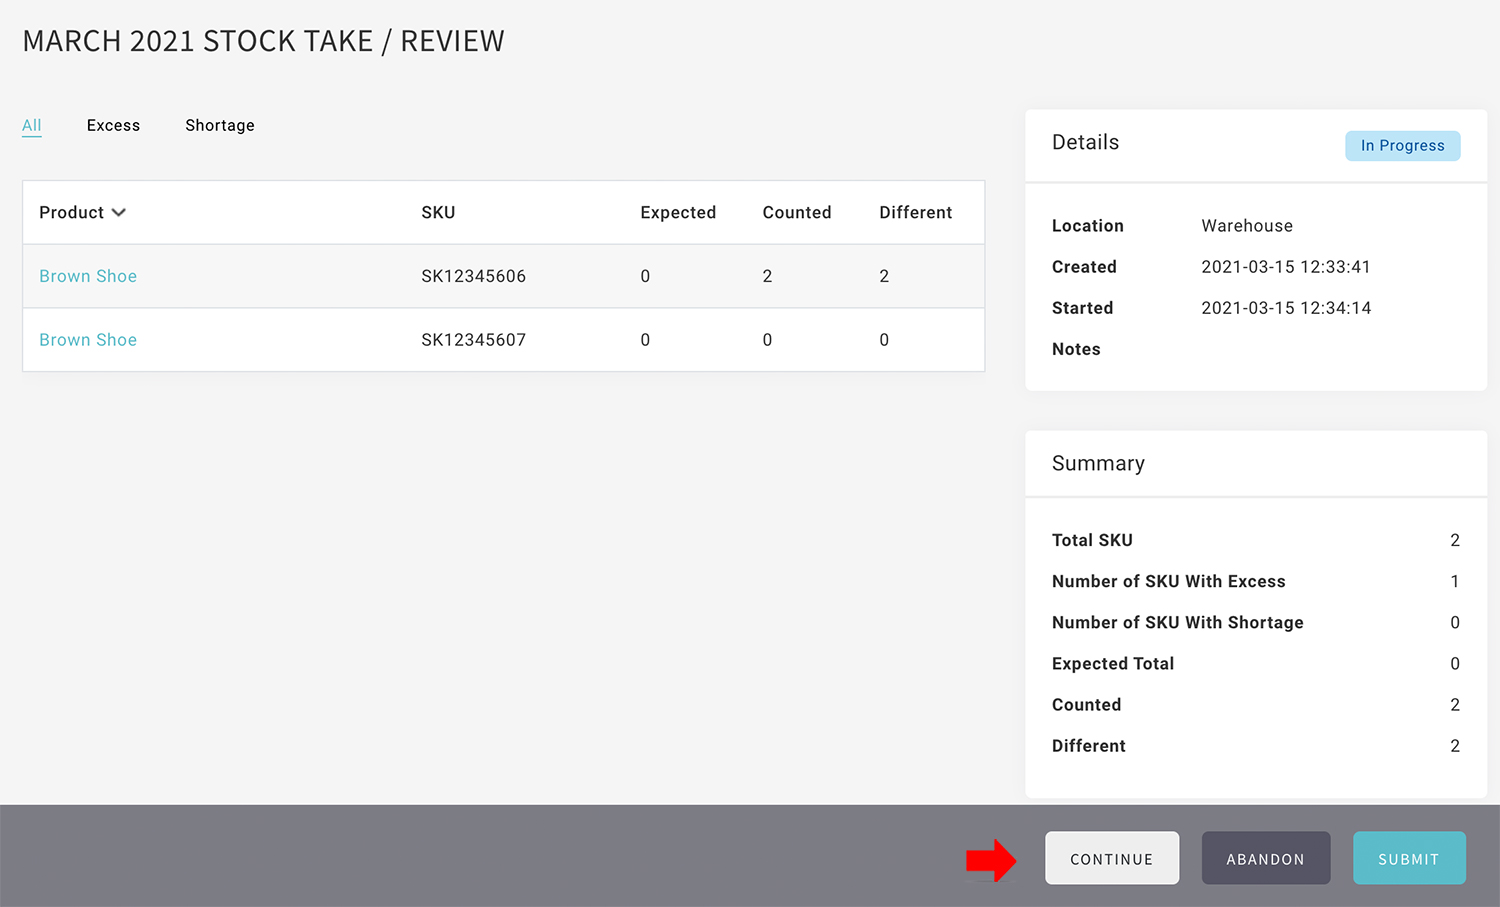
- Click [REVIEW REPORT] to check the progress and status.
- You may [ABANDON] to discard the counting.
- Select [CONTINUE] to complete the updated.
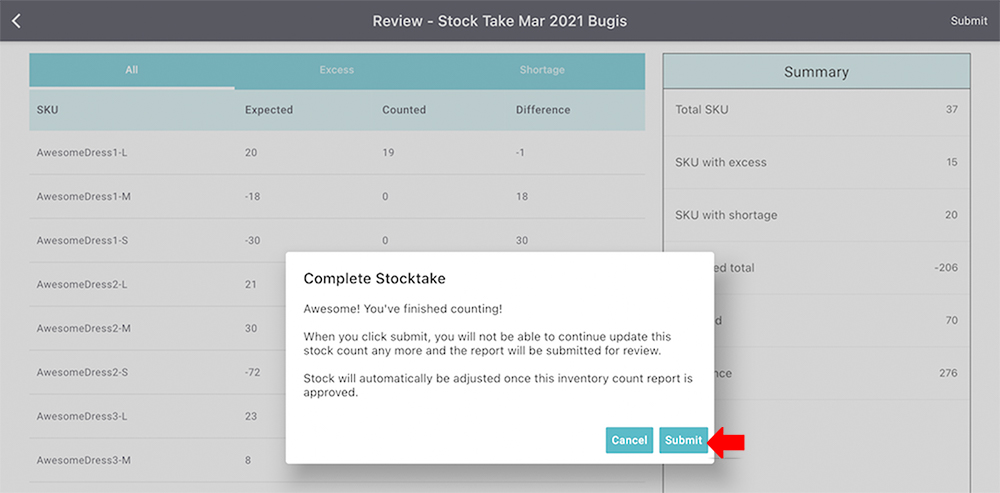
- Click on [SUBMIT] to end the counting and update the stock.
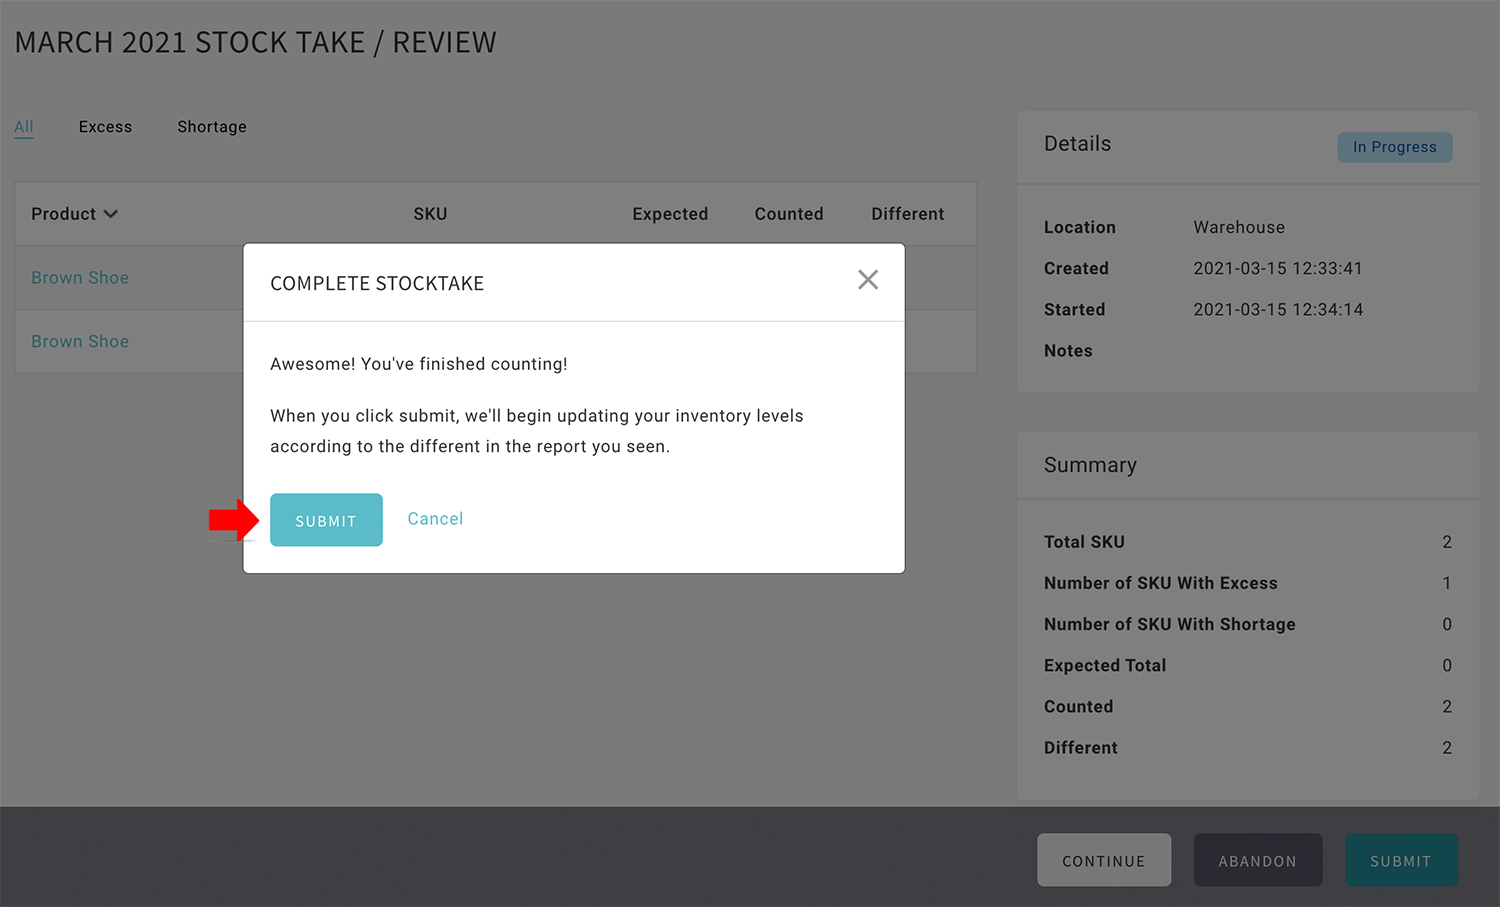
- Click on [SUBMIT] to confirm the submission.

- All the SKU with inventory variance will be updated once click submit.
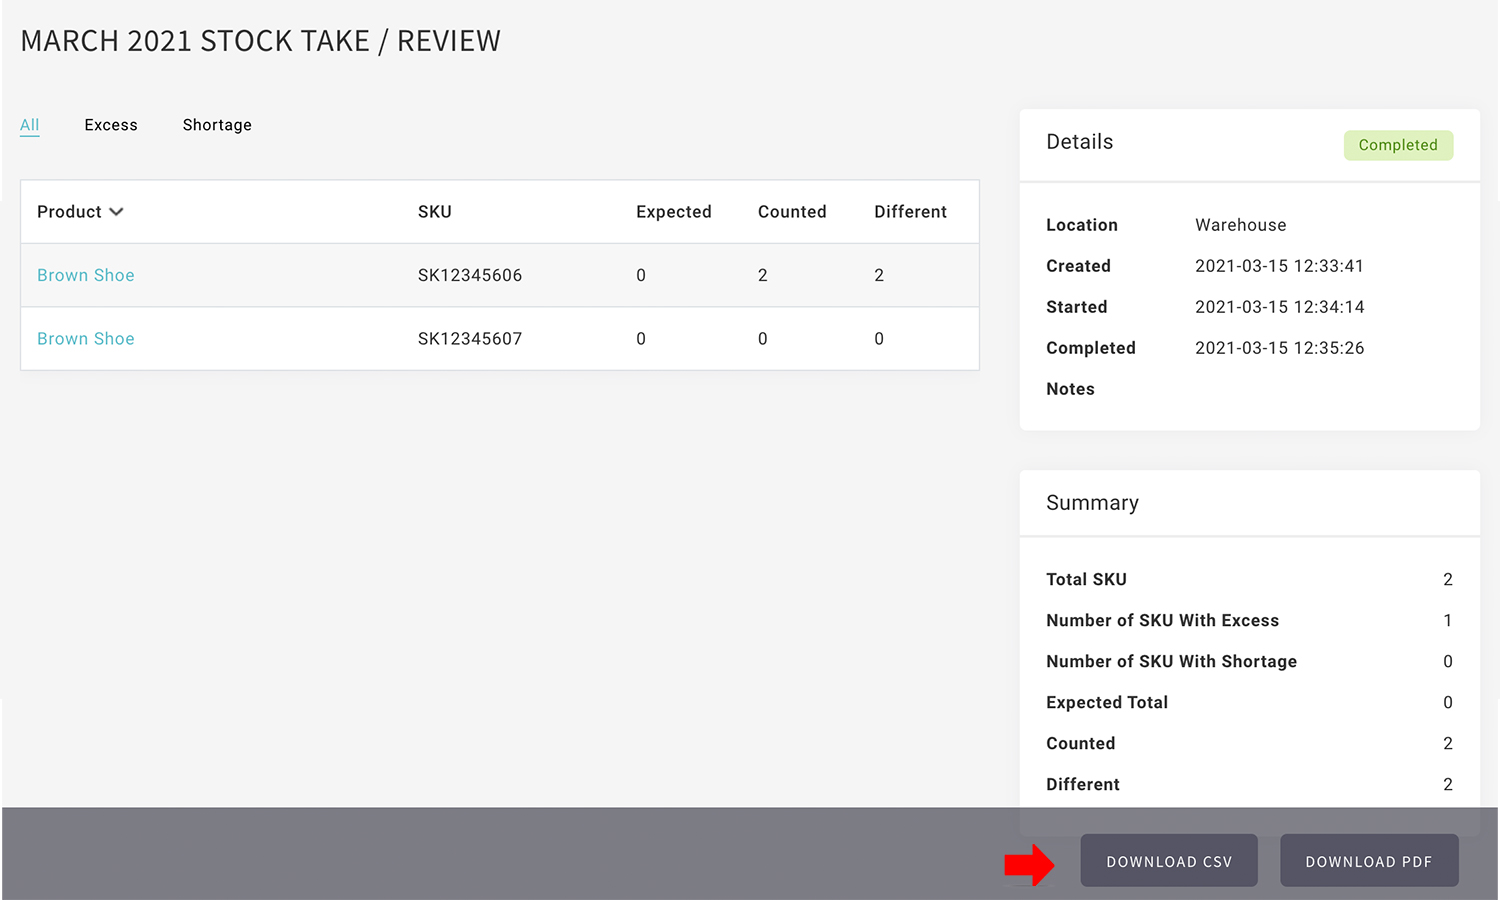
- Submitted inventory count will have status [COMPLETED] and it is not allow to edit.
- You can download the report in CSV or PDF by individual inventory count task.
Inventory Count at POS
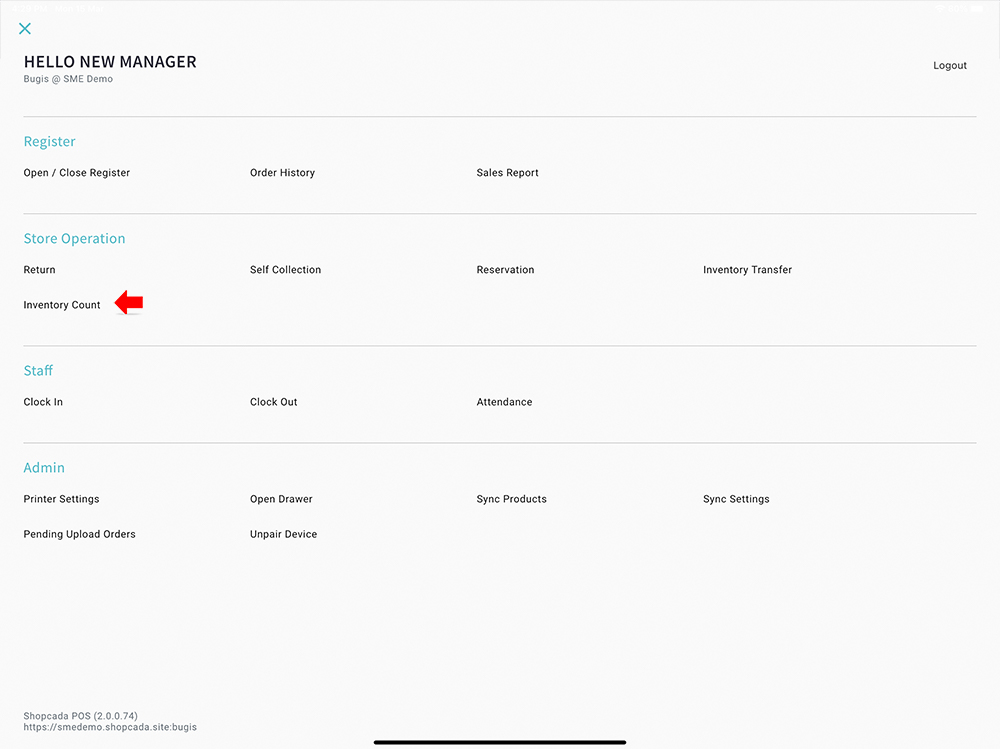
- From POS Admin, go to STORE OPERATION > INVENTORY COUNT
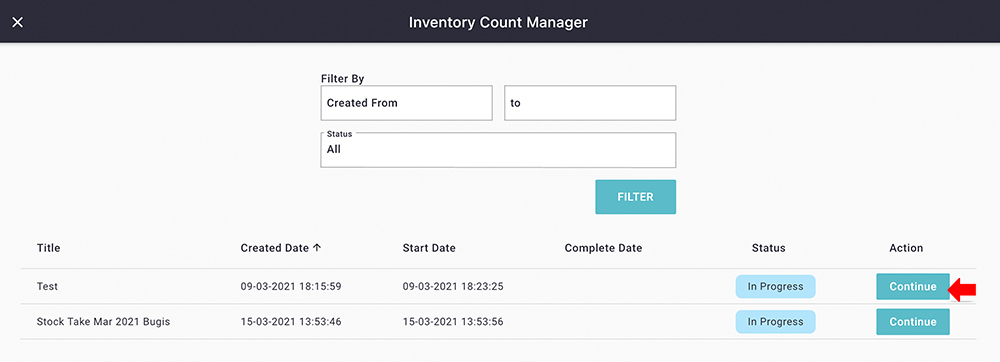
- Locate the inventory count created by back office. Inventory count will always create / initial from the Shopcada dashboard.
- Tab action option [START]
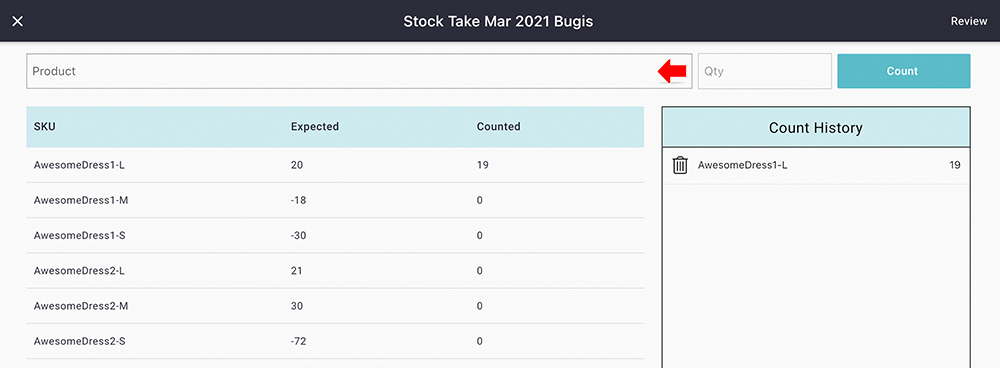
- Start scan in the barcode / type in the quantity counted.
- If you scan barcode, system will auto consolidate ad update the total scanned quantity by each SKU.
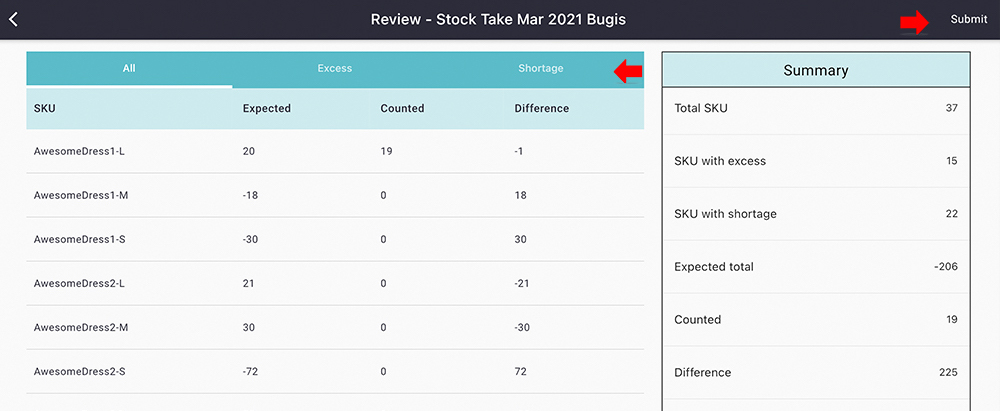
- Click [REVIEW] to check the status.
- Tab [BACK] to complete the updated.
- Click on [SUBMIT] to end the counting and update the stock.
- Click on [SUBMIT] to confirm the submission.
- Submitted inventory count will have status [SUBMITTED] and it is not allow to edit.
- Admin at the back office need to update the status to [COMPLETED]. Once update, the system will make the adjustment automatically.
- You can print the report via the receipt printer.
- You can download the report in CSV or PDF by individual inventory count task from Shopcada dashboard.